How to Take Apart PS5 Controller to Clean Buttons?
Maintaining your PS5 DualSense controller ensures the best performance and longevity. Over time, dust, grime, and debris tend to accumulate and cause your buttons to get sticky or unresponsive. Cleaning your buttons by disassembling your controller is usually the solution. To safely take apart the PS5 controller to clean buttons, switch off your controller and unplug it.
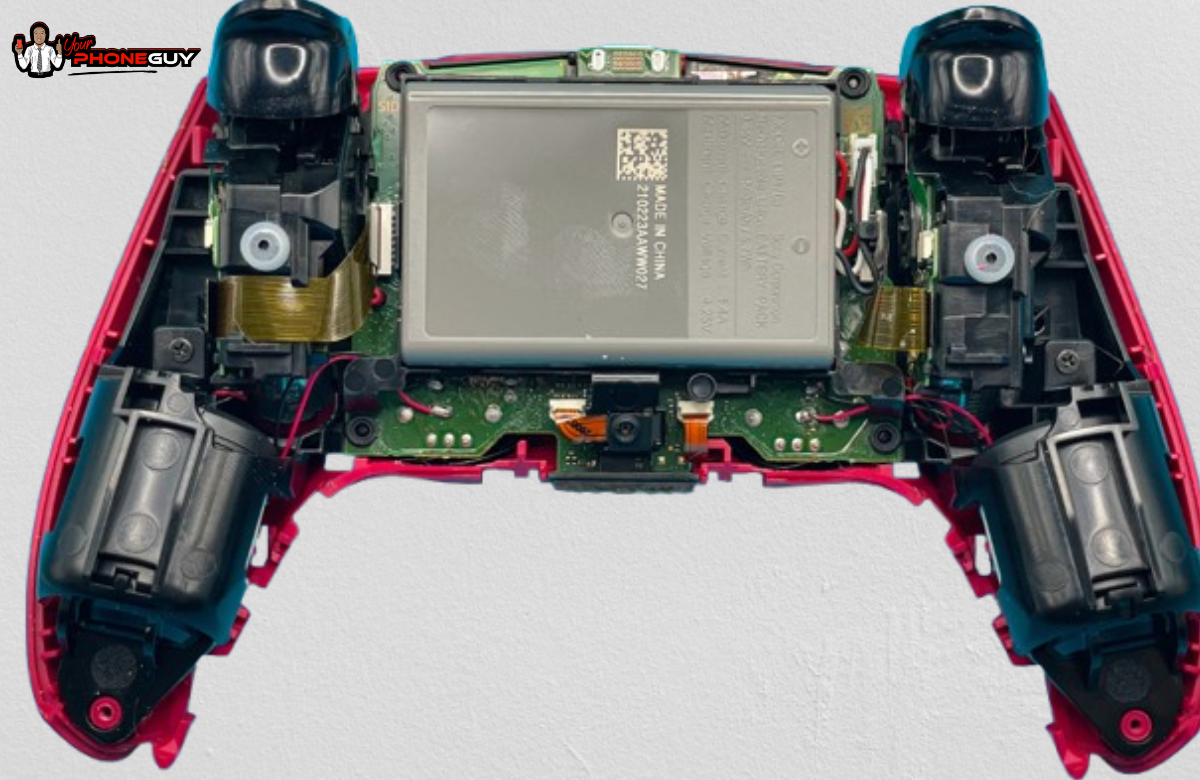
Carefully remove the back panels with a plastic pry tool and remove the L1 and R1 buttons. Unscrew the internal components, remove the battery, and get access to the button membranes. Clean the buttons and circuit board with isopropyl alcohol and cotton swabs and reassemble the controller, ensuring all parts work. During the Game Console Repair process, ensure you handle all components gently. Reassemble the controller, verifying that all parts function correctly.
9 Steps To Disassemble and Clean Your PS5 Controller Buttons
Here is a step-by-step guide to take your PS5 apart.
1. Power Off and Disconnect
Switch the controller off and unplug all the cables.
For safety, it is recommended that the controller sit for a while to drain any residual power.
2. Remove the Back Panels
There is a seam between the black center panel and the white handles attached to the back sides of the controller.
With a plastic pry, gently insert it into the seam right at the bottom of one and slowly pry away the panel.
Repeat the same process for the other handle to remove the back panels.
3. Remove the Back Panels
Once the back panels are removed, use the pry tool to lift and remove the L1 and R1 buttons carefully.
Be gentle, as these buttons are sensitive.
4. Remove the Screws and Open the Controller
With the L1 and R1 buttons removed, you'll find screws beneath their positions.
Use the precision Phillips-head screwdriver to remove these screws.
Additionally, remove the screws located at the bottom of the controller's handles.
Once all screws are removed, gently pry apart the front and back halves of the controller using the pry tool.
5. Disconnect the Battery
Inside the controller, you'll see the battery connected to the motherboard.
Carefully disconnect the battery connector using tweezers or a spudger, avoiding any damage to the wires or connector.
6. Access the Button Membranes
With the battery disconnected, remove any additional screws securing the internal components to access the button membranes.
Gently lift the motherboard to expose the rubber membranes covering the buttons.
7. Clean the Buttons and Membranes
With the buttons removed, use a lint-free cloth lightly dampened with isopropyl alcohol to clean around the button sockets.
For stubborn dirt, use cotton swabs dipped in alcohol to clean sticky button on a PS5 controller effectively.
Wipe down the circuit board gently and use compressed air to blow out any remaining dust.
If the thumbsticks are removable, remove them for a thorough clean.
Use a Q-tip and alcohol to clean around the mechanism and the base where the thumbsticks connect.
8. Reassemble the PS5 Controller
Put all parts together carefully by reversing the disassembly steps.
Align the parts and ensure that you tighten the screws but not too tightly.
Reattach the L1 and R1 buttons, ensuring they click into place correctly.
Reinstall the back panels by aligning them and pressing gently until they snap into place.
9. Test the Controller
Turn on your controller after disassembly and test all buttons to determine if they work perfectly.
If the problem remains unresolved, you may consider professional help.
Why You Need to Take Apart Your PS5 Controller?
Apart from cleaning your controller buttons, you can disassemble it for several reasons:
Repairing Stick Drift: Stick drift is a common problem in which the controller senses movement even when you're not touching it. You can fix or replace the parts causing this issue by opening the controller.
Component Replacement: If parts like the thumb grips or buttons are worn out or broken, removing the controller lets you change them, helping the controller last longer.
Customization: Some people like to customize their controllers with new shells or buttons. To do this, you need to disassemble the controller.
Battery Replacement: The controller's battery can wear out over time. Taking it apart lets you replace the battery and keep it working wirelessly.
What Precautions to Take Before Disassembling the PS5 Controller?
Before disassembling your PS5 DualSense controller, it's essential to take several precautions to ensure safety and prevent damage:
Work in a Clean Environment: Find a clean, well-lit area. This reduces the chance of dirt getting inside and helps keep track of small parts.
Gather Appropriate Tools: Get the right tools, like a small Phillips screwdriver, plastic pry, and tweezers. Avoid using metal tools, as they might damage the plastic parts.
Organize Small Parts: As you take the controller apart, put screws and small pieces in labeled containers. This will help you not lose anything and make reassembly easier.
Avoid Excessive Force: Pry open the casing and pull off the components gently. Too much force might break clips or damage some delicate parts.
Consult Reliable Guides: Look for detailed guides or tutorials explaining how to disassemble the controller properly. Visual instructions can be especially useful.
Conclusion
In conclusion, taking your PS5 controller apart for cleaning or repair can significantly enhance its performance and lifespan. Following the step-by-step process of powering off the device, removing panels, and carefully cleaning internal components, you can address common issues such as stick drift, component wear, or battery degradation. It's vital to take precautions, including working in a clean environment and using appropriate tools, to avoid damage. You can also contact experts like Your Phone Guy LLC for professional assistance.


