How to Fix a Hairline Crack on Your iPad
Accidents happen, and sometimes, they leave us with hairline cracks on our beloved gadgets. If you find yourself staring at a hairline crack on your iPad, don't fret. With the right guidance and a bit of patience, you can repair it and restore your iPad to its former glory.
Tips to Fix a Hairline Crack on Your iPad
In this comprehensive guide, we'll walk you through the steps to fix a hairline crack on your iPad. Whether you're an avid gamer or just an iPad enthusiast, these tips will come in handy.
Tools You'll Need
Before you embark on your iPad repair journey, gather the necessary tools:
Microfiber cloth: For cleaning the screen and assessing the damage.
Screen protector: To help prevent further damage.
Clear nail polish or glass adhesive: Depending on the severity of the crack.
Heat gun or hairdryer: To soften adhesives.
Plastic spudger or opening picks: For safely prying open your device.
Double-sided adhesive tape: To secure the new screen (if needed).
Replacement screen (optional): If the damage is beyond repair.
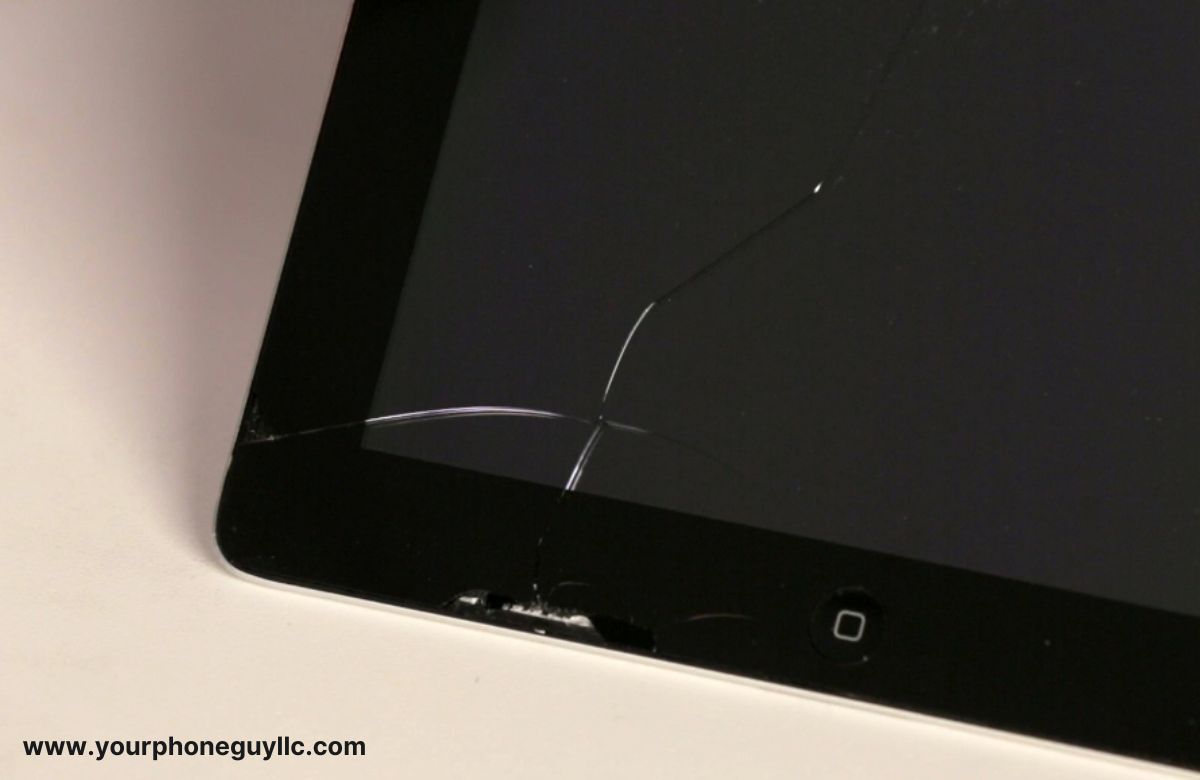
Assess the Damage
Start by assessing the extent of the hairline crack on your iPad. Is it confined to the screen, or has it spread to other parts of the device? If it's solely on the screen, you're in luck; this repair is manageable.
However, if other components are damaged, consider seeking professional help or contacting Your Phone Guy LLC for expert advice on game consoles and device repairs.
Clean the Screen
Before you start any repair, it's crucial to have a clean surface. Use a microfiber cloth to wipe the screen, removing any dust or debris gently. This step ensures that you have a clear view of the crack and prevents any foreign particles from interfering with the repair process.
Use a Screen Protector as a Temporary Fix
If the hairline crack on your iPad is minimal and hasn't affected the touch sensitivity, you can opt for a temporary fix using a screen protector. Apply the protector to the screen, making sure to smooth out any air bubbles. While this won't completely eliminate the crack's visibility, it will prevent it from worsening and provide a smooth surface for touch interactions.
Repairing the Hairline Crack
If you prefer a more permanent solution, follow these steps to repair the hairline crack on your iPad:
Prepare the Surface: Ensure the screen is clean and free from dust and fingerprints.
Assess the Crack: If the crack is shallow and doesn't affect the device's functionality, you can proceed with the repair.
Apply Clear Nail Polish or Glass Adhesive: Using a small brush or toothpick, carefully apply a thin layer of clear nail polish or glass adhesive along the crack. Be cautious not to let the liquid seep into the device's internals.
Let it Dry: Allow the nail polish or adhesive to dry completely. This might take a few hours, so exercise patience.
Test the Screen: Once it's dry, power on your iPad and test the touch sensitivity. If it's working correctly, you've successfully repaired the hairline crack.
Apply a Screen Protector: To protect your screen further and maintain its appearance, apply a screen protector.
Replacing the Screen (Advanced Option)
If the hairline crack is severe or the touch sensitivity is compromised, you may need to replace the screen. This is a more complex procedure and may require professional assistance from Your Phone Guy LLC or a similar phone repair service. Here's a simplified overview:
Gather Your Tools: Ensure you have the necessary tools, including the replacement screen.
Safety First: Power off your iPad and disconnect it from any power source.
Open the Device: Use a plastic spudger or opening picks to pry open the iPad carefully. Be gentle to avoid further damage.
Remove the Old Screen: Disconnect the old screen and remove it from the device.
Install the Replacement: Connect the replacement screen and secure it in place using double-sided adhesive tape.
Test the Screen: Power on your iPad and test the new screen's functionality. Ensure touch sensitivity is restored.
Reassemble the Device: Carefully reassemble the iPad, ensuring all components are correctly aligned.
Final Inspection: Examine the device for any issues and ensure that it's fully functional.
Conclusion
Repairing a hairline crack on your iPad is a feasible DIY task, but it requires attention to detail and patience.
If you're uncomfortable with the process or face challenges along the way, consider reaching out to professionals like Your Phone Guy LLC, who can provide expert advice and assistance not only for iPad repairs but also for game console and device repairs.
Whether you're a tech enthusiast or simply seeking to restore your device, these repair tips can help you regain the flawless functionality and aesthetics of your iPad.